A few simple steps to add a soft border to an image, this time using Adobe Photoshop Elements 11.
 In Fade to white we walked through adding a soft border to a photograph using Adobe Photoshop CS6. Here’s we’re going to do the same thing with Adobe Photoshop Elements 11.
 Open your image in the Photoshop Elements 11 editor.
 Choose the rectangular Select tool
  from the toolbar and draw a box around your image where you’d like the soft border to be.
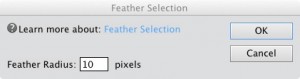 From the main menu choose Select | Feather. The Feather Selection box lets you control how wide your soft border is going to be using the Feather Radius setting. The smaller the value the closer to a hard, white border you’ll see.
There’s no preview feature, but you can use the Undo function to try different values until you get the look you want.
Here we’re going to use a radius of 10 pixels.
Click OK.
 Now you need to invert your selection so that you have the border selected rather than the main image. Choose Select | Inverse to do this.
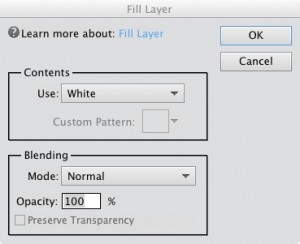 Now choose Edit | Fill Selection…
Achieving a good soft border requires the foreground and background colours to be merged, so in the Contents section choose the colour of the page on which you’re going to place your image. Here we’re using white.
Click OK.
 Your image now has a soft border. If you don’t like the size of the border choose Edit | Undo three times to undo the fill, inverse and feather steps, then you can repeat with a different border size.